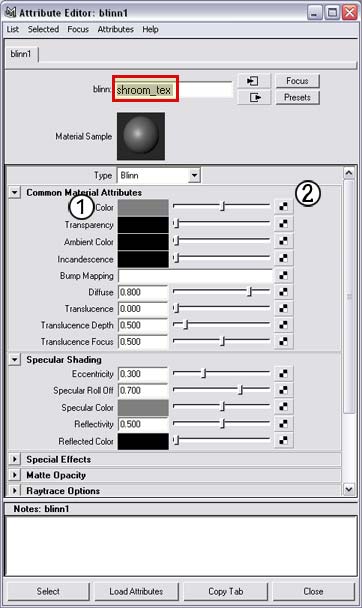
First off, let's change our shader's name to shroom_tex [short for mushshroom texture].
Once you have a scene full of dozens of shaders, it will be essential to be able to tell them apart, so getting in the habit of naming them now will be very rewarding later [I often add the _tex at the end in order to easily identify model and texture pairs in my scenes.
Maya wont let you name two objects the same name -even if one is a model and one is a shader]. |
|
Tip 1:
If you decide that you dont like a particular attribute you have added to a channel, simply r-click on the channels name and choose Break Connection
Tip 2:
If you want to add an attribute to a channel. Click the checkerboard to see what there is to add, or if you already have a material you want to add to the channel, you can m-mouse button + drag it right on top of the channel |
 |
|
Click the Add New  checkerboard next to the color attribute of your shroom_tex. checkerboard next to the color attribute of your shroom_tex.
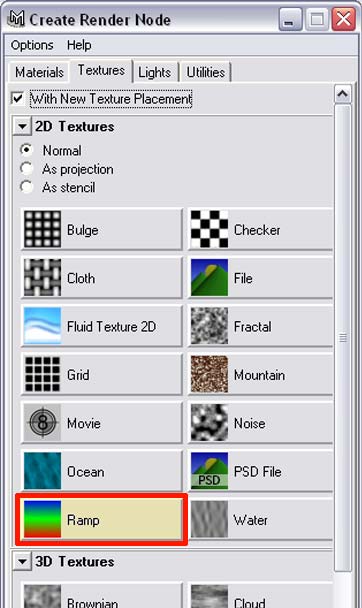
From the following menu, select a Ramp from the 2D Textures panel.
Go back to the Hypershade and using the m-mouse button, drag your shroom_tex over the top of your model and drop it.
Hit 6 on your keyboard to use hardware shading in your viewport and you should see the red and blue on your mushroom.
Unfortunately, it looks like the colors are running along the wrong axis. Not to worry, we'll fix this when we adjust the properties of the ramp. |
 |
|
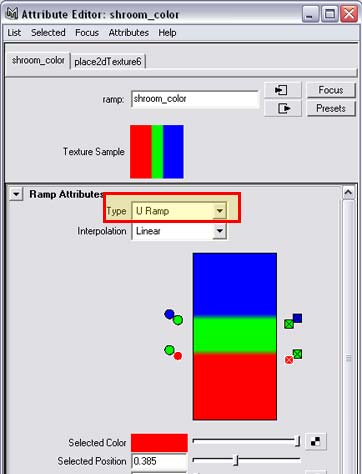
Rename your ramp to shroom_color and set the ramp Type to U Ramp.
This wil translate the ramp across the U axis instead of the V axis.
Now start playing with the placement of your color swatches. You can move them by grabbing the colored circle to the left of the ramp swatch.
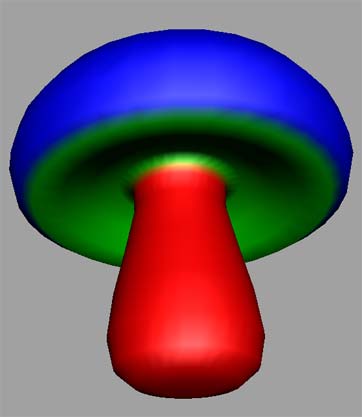
Bring the blue down so it starts to wrap just around the lip of your mushroom cap. Then pull the green color up to tighten the threshold.
If you want to add a new node to the ramp, click on the swatch where you want to insert, and a new color dot will appear to the left.
If you add too many, or don't like what you have added, click the corresponding X to the right.
Add a new node to the color swatch by clicking towards the higher end of the green area and then drag it down towards where the cap meets the stem. Finish off your color placements by snugging the red node up next to the lower green one.
|
 |
 |
| |
|
let's improve on that color scheme > >
|
