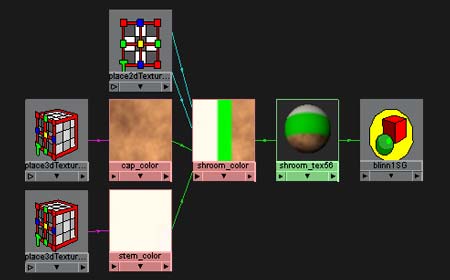
So far, if you map your shading network for your shroom_color, you should have something like this in your work area.
|
With two of our three color areas under control, it's time to move onto the last one. For this one. I want to use a 2D texture called Noise.
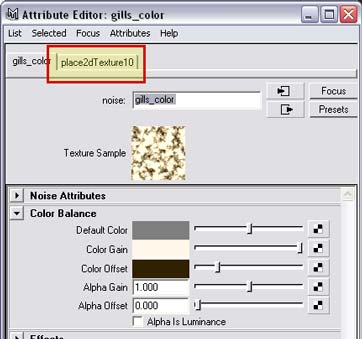
Name your new noise texture gills_color and pull up its Color Balance in the Attribute Editor.
Give it's Color Gain a nice light [nearly white] warm yellow and it's Offset a dark brown
Now hop over to the place2D tab [it can also be accessed by double clicking the 2D placement node just downstream in the Hypershade]
Up the repeats along the V axis to 15. This will tile the texture 15 times along the V axis for every single unit on the U axis.
|
 |
 |
Now pull up your shroom_color ramp in the Attribute Editor. Select either one of your green channels and drop your gills_color into it. If you lost your new gills_color in the Hypershade, don't worry - it's hiding under the Textures tab in the top panel. Now select your other green channel and do the same.
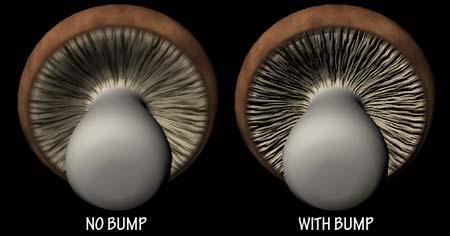
While this is shaping up to be nice little mushroom, there is one last thing we can do to add that extra punch - a bump map. A bump map is a lighting trick that exaggerates the surface details of an object. It uses the greyscale information that you pipe into it to imply a relief on a surface with 50% grey doing nothing, white causing an outward relief and black appearing like a recess. |
|
With your shroom_tex in the Attribute Editor, drag [with the middle mouse button] your shroom_color node from the Hypershade onto the Bump Mapping slot.
In the following bump2d window that pops into the Attribute Editor, set the Bump Depth to .25 [you can also try -.25 and see what happens]. If you need to get back to this window again, double-click the bump2d node in the Hypershade.
|
| < < back |
|
that's good enough, let's take a picture > >
|
